| Level | Item | Amount |
|---|---|---|
| 5 | Item Description: Read this recipe and bring it to the Alchemy Master in flarine. | 1 |
| 30 | Item Description: You have unlimited access to Coral Island for 1 day after activating this Ticket. Coral Island contains monsters level 43 to 69. | 1 |
| 45 | Item Description: Contains lv. 45 equipment and weapons. Last for 1 day. | 1 |
| 45 | Item Description: This pouch can contain a Scroll of AProtect, GProtect, SProtect, XProtect, Smelting. You might even get a special fashion set!. | 5 |
| 45 | Item Description: This pouch can contain a Scroll of AProtect, GProtect, SProtect, XProtect, Smelting. You might even get a special fashion set! | 5 |
| 45 | Item Description: May contain: Scroll of SProtect, GProtect, XProtect, Smelting, Reversion, Scroll of Party Ultra, or Blessing of the Goddess. You might even get a special fashion set! | 5 |
| 45 | Item Description: This pouch can contain a Scroll of XProtect, Sprotect, GProtect, Blessing of the Goddess, Scroll of CS-Pet Skinchange, Scroll of Party Ultra, or even a pick-up pet! | 5 |
| 60 | Item Description: You have unlimited access to Azria for 1 day after activating this Ticket. Azria contains monsters from level 73 to 115. | 1 |
| 105 | Item Description: Contains lv. 105 equipment and weapons. Last for 1 day. | 1 |
| 122 | Item Description: This pouch can contain a Scroll of AProtect, GProtect, SProtect, XProtect, Smelting. You might even get a special fashion set!. | 5 |
| 122 | Item Description: This pouch can contain a Scroll of AProtect, GProtect, SProtect, XProtect, Smelting. You might even get a special fashion set! | 5 |
| 122 | Item Description: May contain: Scroll of SProtect, GProtect, XProtect, Smelting, Reversion, Scroll of Party Ultra, or Blessing of the Goddess. You might even get a special fashion set! | 5 |
| 122 | Item Description: This pouch can contain a Scroll of XProtect, Sprotect, GProtect, Blessing of the Goddess, Scroll of CS-Pet Skinchange, Scroll of Party Ultra, or even a pick-up pet! | 5 |
| 175 | Item Description: This pouch can contain a Scroll of AProtect, GProtect, SProtect, XProtect, Smelting. You might even get a special fashion set!. | 5 |
| 175 | Item Description: This pouch can contain a Scroll of AProtect, GProtect, SProtect, XProtect, Smelting. You might even get a special fashion set! | 5 |
| 175 | Item Description: May contain: Scroll of SProtect, GProtect, XProtect, Smelting, Reversion, Scroll of Party Ultra, or Blessing of the Goddess. You might even get a special fashion set! | 5 |
| 175 | Item Description: This pouch can contain a Scroll of XProtect, Sprotect, GProtect, Blessing of the Goddess, Scroll of CS-Pet Skinchange, Scroll of Party Ultra, or even a pick-up pet! | 5 |
| 175 | Item Description: A cute little pet that follows its master around and picks up dropped items! Effects: Allstats +15, PVE Damage +15%, HP Rate +15%, Spellrate +15% | 1 |
| Soul Level | Item | Amount |
|---|---|---|
| 5 | Item Description: A sealed reward granted only to those who’ve ascended through soul mastery. | 1 |
| 25 | Item Description: A sealed reward granted only to those who’ve ascended through soul mastery. | 1 |
| 50 | Item Description: Get a colorful aura wing! | 1 |
| 50 | Item Description: A sealed reward granted only to those who’ve ascended through soul mastery. | 1 |
| 75 | Item Description: A sealed reward granted only to those who’ve ascended through soul mastery. | 1 |
| 75 | Item Description: The glyph trembles with whispers of the dead. Effects: SL Experience +25% | 1 |
| 100 | Item Description: A sealed reward granted only to those who’ve ascended through soul mastery. | 1 |
| 125 | Item Description: A sealed reward granted only to those who’ve ascended through soul mastery. | 1 |
| 125 | Item Description: This cloak can be worn by female and male characters. Effects: PVE Damage +15%, Experience +50%, SL Experience +100% | 1 |
| 150 | Item Description: A sealed reward granted only to those who’ve ascended through soul mastery. | 1 |
| 175 | Item Description: A cute little pet that follows its master around and picks up dropped items! Effects:Allstat +30, PVE Damage +30, HP Rate +30, Spellrate +30, SL Experience +50% | 1 |
| 175 | Item Description: A sealed reward granted only to those who’ve ascended through soul mastery. | 1 |
| 200 | Item Description: A sealed reward granted only to those who’ve ascended through soul mastery. | 1 |
| 225 | Item Description: A mysterious arachnid woven from ancient magic. With every step, it strengthens your soul. Not for the faint of heart. Effects: Allstat +100 | 1 |
| 225 | Item Description: A sealed reward granted only to those who’ve ascended through soul mastery. | 1 |
| 250 | Item Description: A sealed reward granted only to those who’ve ascended through soul mastery. | 1 |
| 275 | Item Description: Includes a baby fairy! Be careful with it! | 1 |
| 275 | Item Description: A sealed reward granted only to those who’ve ascended through soul mastery. | 1 |
| 300 | Item Description: Coiled and tense. It twitches at night. You’re being watched. | 1 |
| 300 | Item Description: A sealed reward granted only to those who’ve ascended through soul mastery. | 1 |
| 325 | Item Description: A sealed reward granted only to those who’ve ascended through soul mastery. | 1 |
| 350 | Item Description: Stained with ancient blood. It remembers every step it ever took. | 1 |
| 350 | Item Description: A sealed reward granted only to those who’ve ascended through soul mastery. | 1 |
| 375 | Item Description: A sealed reward granted only to those who’ve ascended through soul mastery. | 1 |
| 400 | Item Description: Still pulsing with forgotten rage. A remnant of a hunter long gone. | 1 |
| 400 | Item Description: A sealed reward granted only to those who’ve ascended through soul mastery. | 1 |
| 425 | Item Description: A sealed reward granted only to those who’ve ascended through soul mastery. | 1 |
| 450 | Item Description: A sealed reward granted only to those who’ve ascended through soul mastery. | 1 |
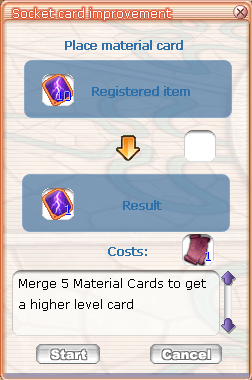
| 460 | Item Description: A forbidden formula whispered among cursed alchemists. Combine: 1x Bloodhunter Head, 1x Tail, 1x Paw — and a Shadowhunter. The result? Something not meant to exist. | 1 |

 | Clockwork | Value |
|---|---|---|
| 1 | Movement Speed | 10% |
| 2 | Attack Power Rate | 10% |
| 3 | HP-Rate | 10% |
 | Meteonyker | Value |
|---|---|---|
| 1 | MP-Rate | 10% |
| 2 | Critical Damage | 10% |
| 3 | PvE Damage | 10% |
 | Razgul | Value |
|---|---|---|
| 1 | SL Experience | 50% |
| 2 | Magic Attack Rate | 10% |
| 3 | Allstat | 10 |
 | Barga | Value |
|---|---|---|
| 1 | Defense Rate | 10% |
| 2 | Range Block | 10% |
| 3 | Melee Block | 10% |
![[B Class] Basilisk of the Great Maw](/images/Guideimg/basilisk.png) | Basilisk | Value |
|---|---|---|
| 1 | Jumping Height | 15% |
| 2 | Experience | 15% |
| 3 | PvE Damage | 15% |


 _Night_
  Aero1
Aero1  Anguson (~Canion~Chron of Madri)
  Astreon
  bASTYY
  Berzerkerz
  Bigguybrede
  BlackEistee/oli
  Chaosdreams
  CHEDDAR
  Craester
  DerEinzigWahreNoob
  Desmon
  Devilcraft
  Ezra
Ezra  Friday
  Giorgio
  Heromsd
  Hiirome
  Hoppre
  i...
i...  JonesFPS
  JonesTheHones
  JoshiiFTW
  Jp
Jp  Juce
Juce  kreashy め
  Lisa
Lisa  LouisVuitton
  LUCKY
LUCKY  malo
malo  MasterL1nq
  Mastula
  MEE6
MEE6  Molodoi
  Mukka
Mukka  p...
p...  Paszaa
  Phantasm
  PINOY23
  Piso
Piso  RaYYY
RaYYY  Selectah
  Serrax / Daniel
  Sindu
Sindu  SoulPenguin
  SZAa
SZAa  Tigra
Tigra  Tutti
Tutti  Twisted_Step (Alter)
  Underlayer
  Vaggat
  Valumi
  Venom™
  w8
w8  Webspider
  whetstone🍫
  WhoAmI
  Xalobae
  Xaylo//JKR
  xiepo
xiepo  Zews
Zews  ✞.Hugo ᶠᵉ
  𐌾𐌷𐌹𐌴𐍆
𐌾𐌷𐌹𐌴𐍆